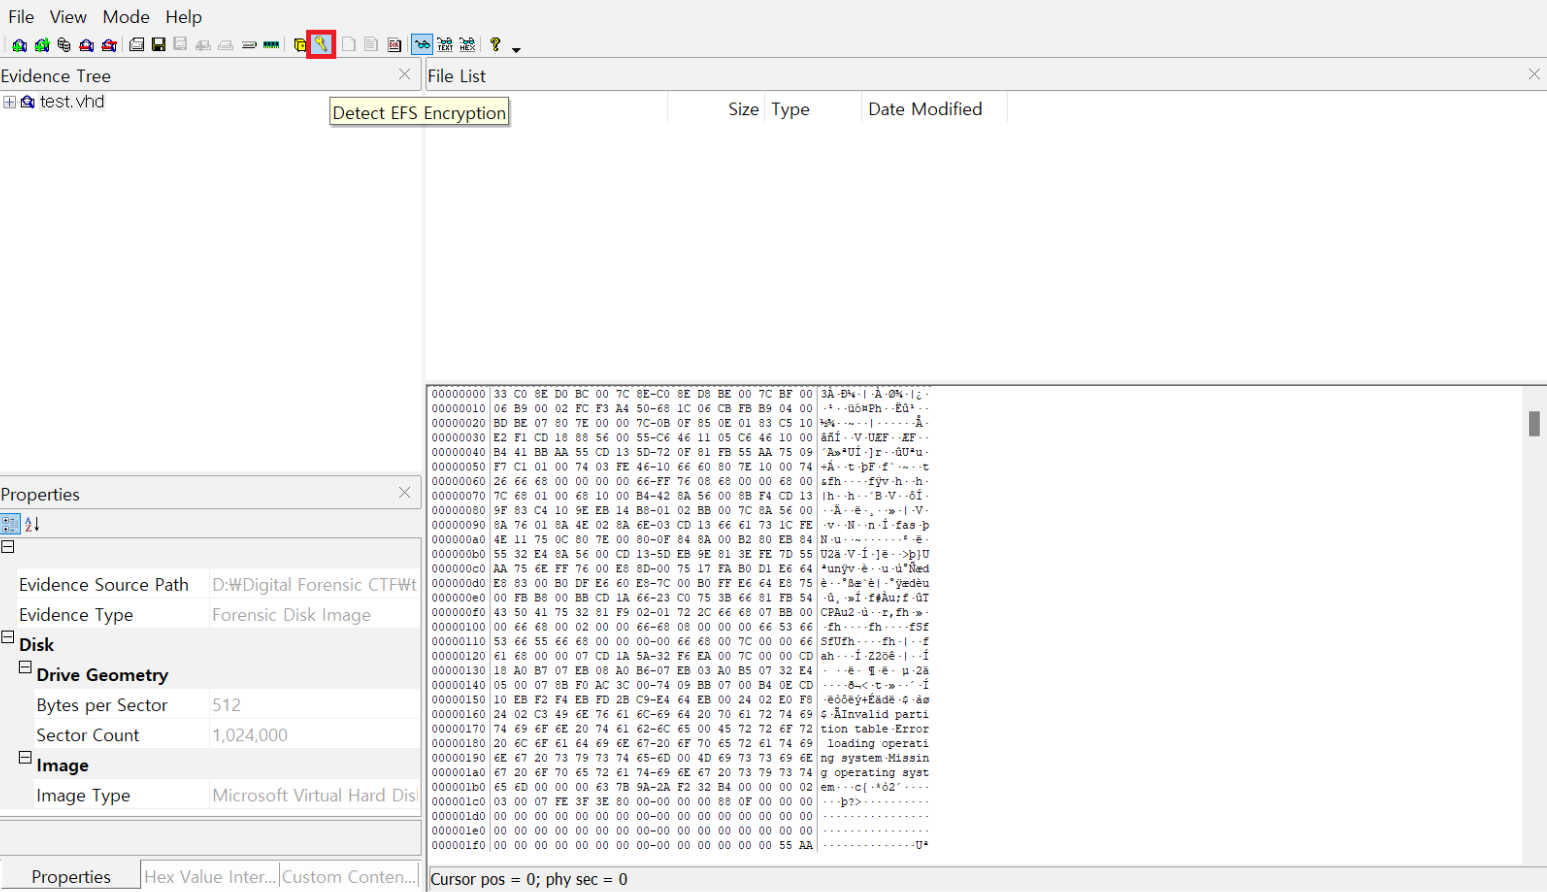
1. 기본 화면
1. Evidence Tree: 디스크 증거를 트리구조로 제공
2. File List: Evidence Tree에서 선택한 항목(파일, 폴더) 정보 제공
3. Properties: Evidence Tree이나 File List에서 선택한 항목의 다양한 정보 제공
- 디스크: Cylinders (Pysical), Tracks per Cylinder (Pysical), Sector per Track (Pysical), Bytes per Sector, Sector Count
- 파티션: Starting Sector, Sector Count
- 파일 시스템: Cluster Size, Cluster Count
4. Viewer: Evidence Tree이나 File List에서 선택한 항목의 Preview, Text value, Hex value 제공
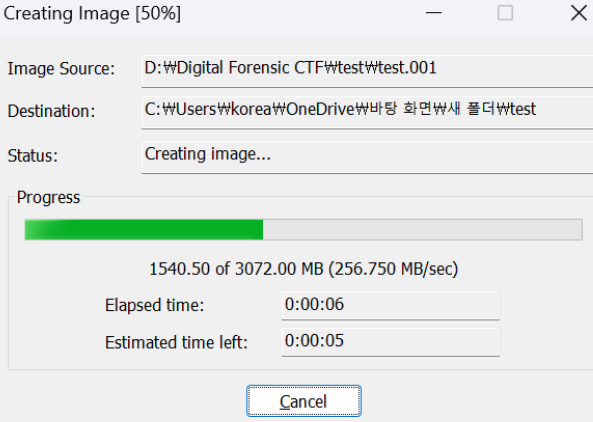
2. 디스크 이미지 (Create Disk Image)
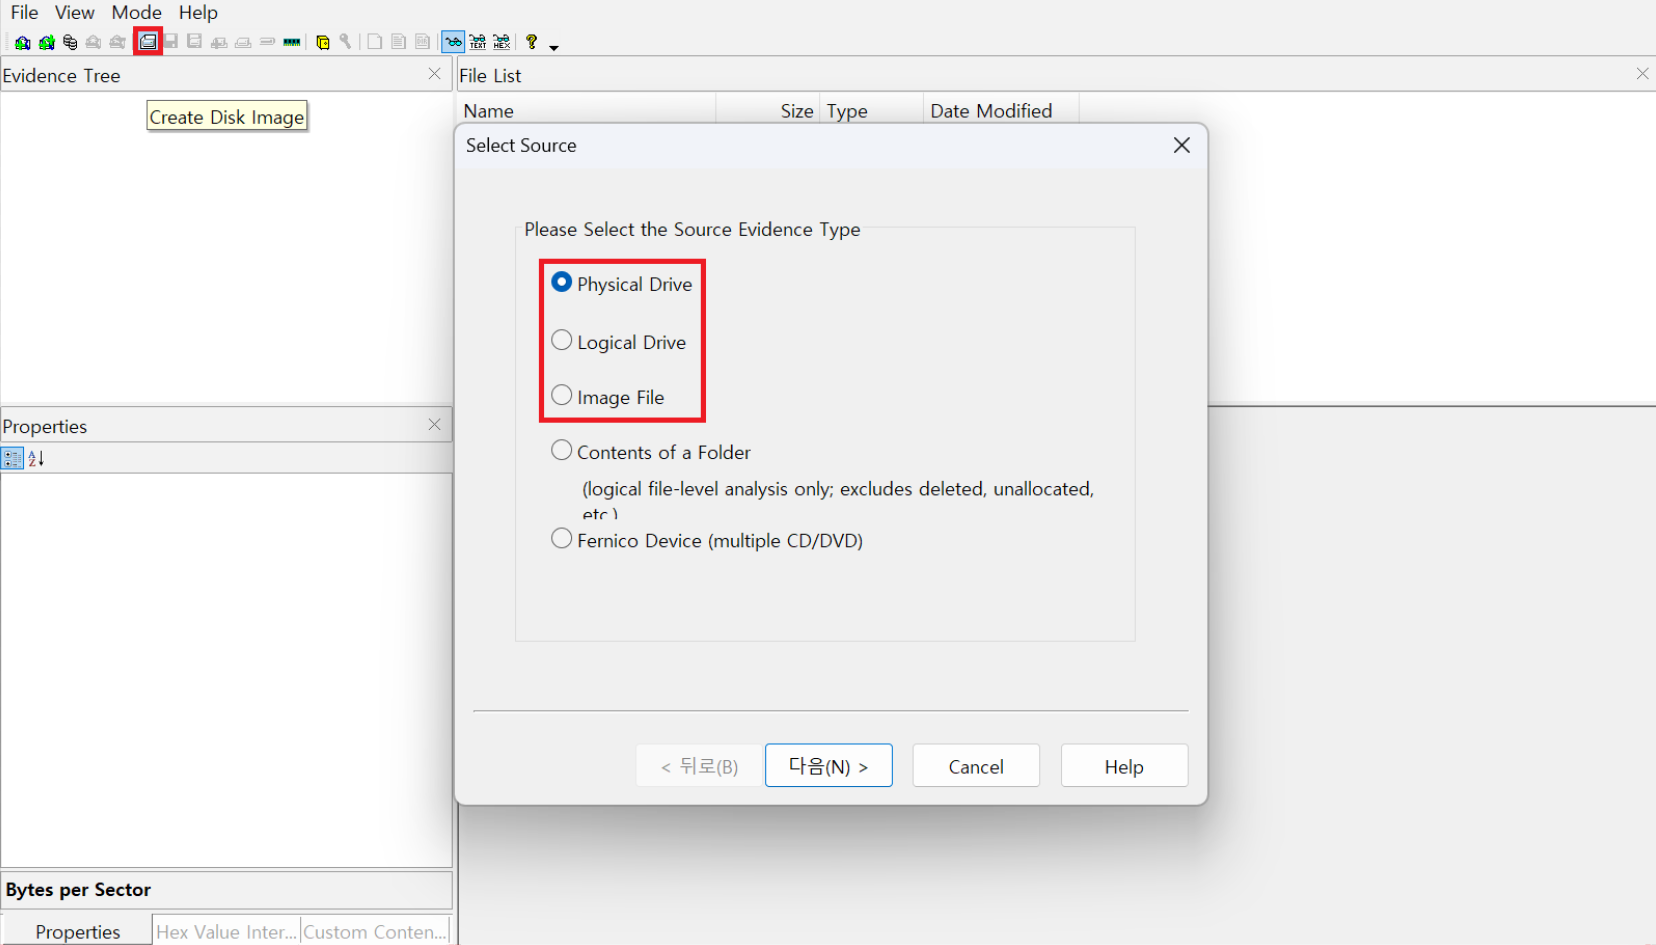
1. File → Create Disk Image → Select Source (이미징 할 데이터의 타입 선택)
- Pysical Drive: 물리 디스크 이미징 → 이미징 할 물리 디스크 선택
- Logical Drive: 물리 드라이브 이미징 → 이미징 할 물리 드라이브 선택
- Image File: 논리 디스크 파일 이미징 → 이미징 할 디스크 파일 선택
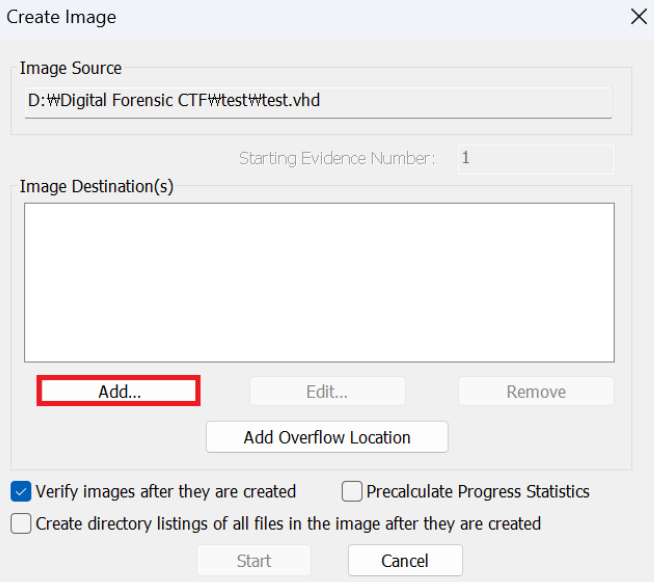
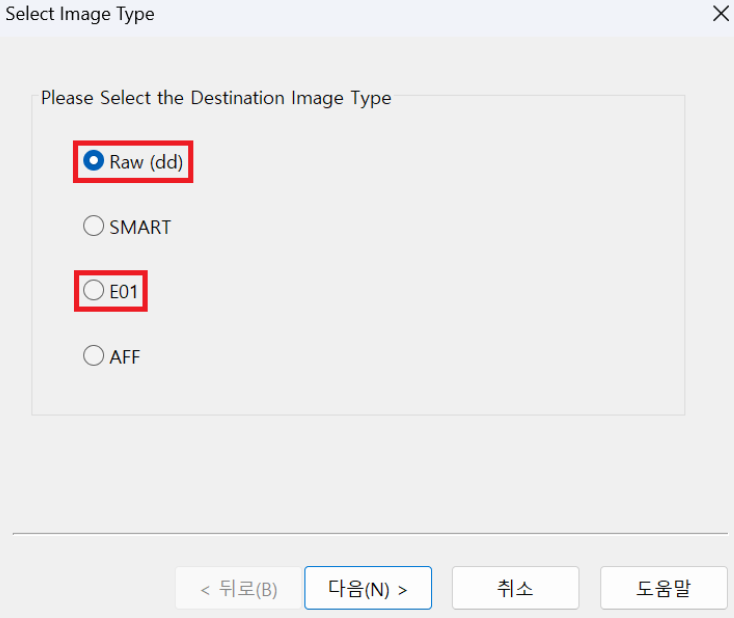
2. Create Image → Add → Select Image Type
- Raw(dd): 원본과 동일한 이미징 (압축 X)
- E01: 압축 이미징 (EnCase Image File Format)
- SMART: 리눅스 운영체제 이미징
- AFF: 대용량 디스크 이미징
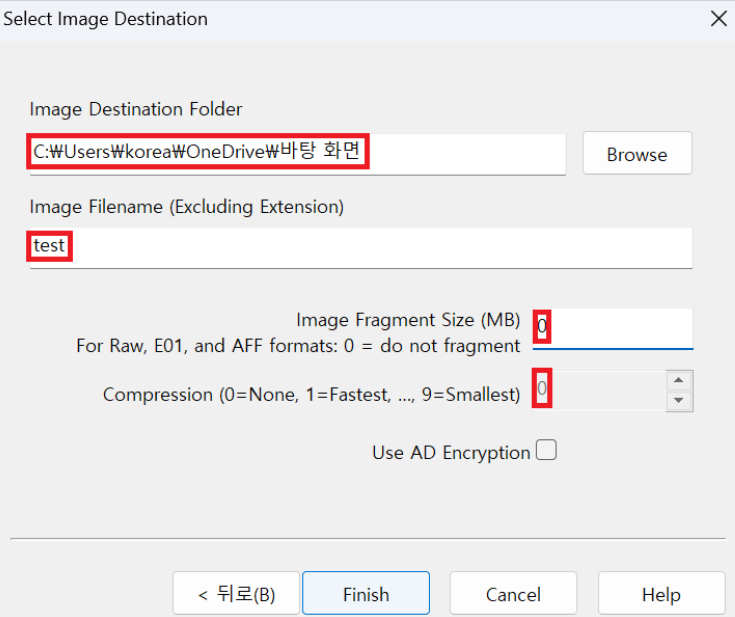
3. Select Image Destination
- Image Destination Folder: 이미지 파일이 저장될 폴더 선택
- Image File Name: 저장될 이미지 파일 이름
- Image Fragment Size (MB): 해당 값(MB)을 기준으로 이미지 파일 분할 저장 (0 = 분할 저장 X, 권장)
- Compression: 압축률 (E01의 Default Compression: 6, 이전 단계에서 Raw(dd) 선택 시 "0" 고정)
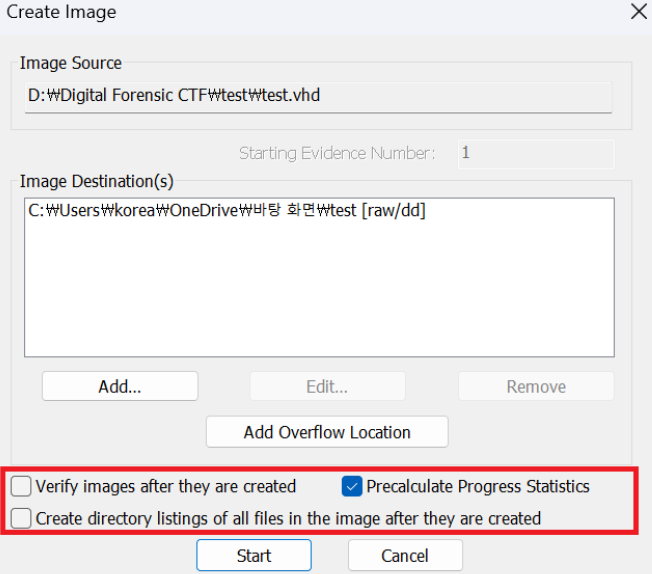
4. Create Image
- Verify images after they are created: 이미징 결과 재검토
- Precalculate Progress Statistics: 이미징 잔여 시간 제공 (사용 권장)
- Create directory listings of all files in the image after they are created: 이미징 된 모든 파일 목록 엑셀 정렬
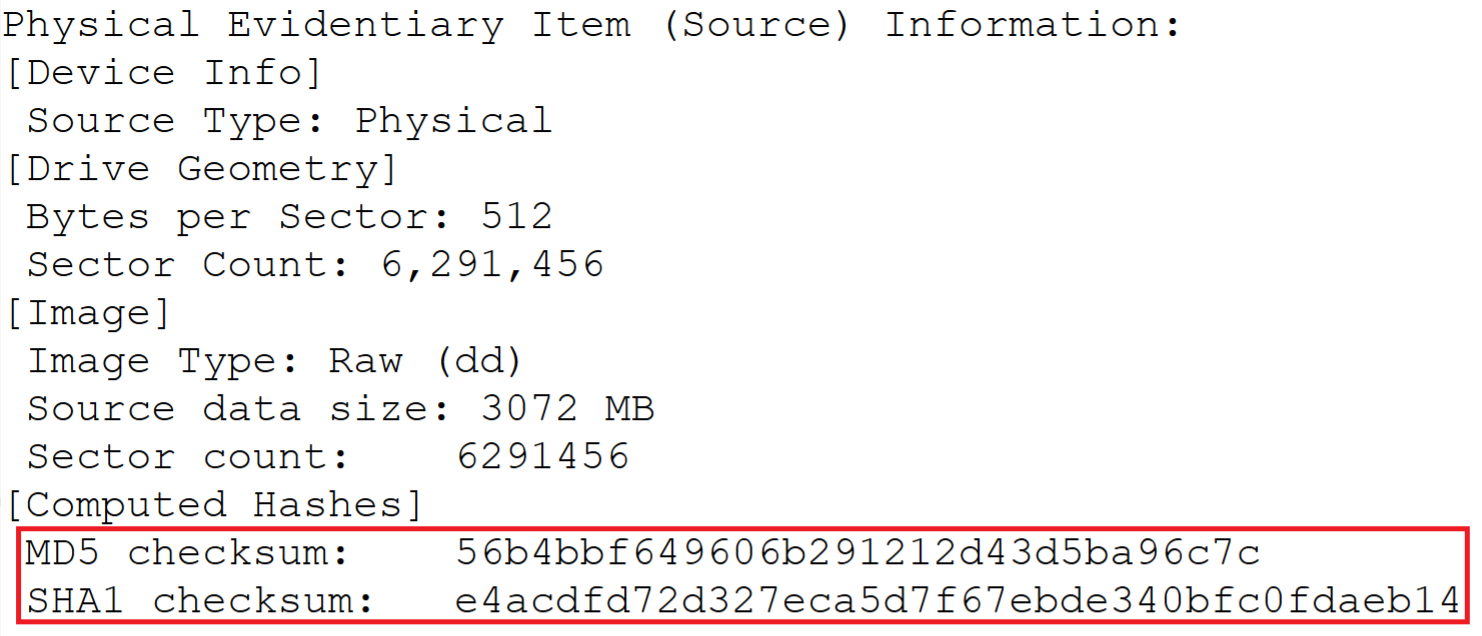
5. Verify
-. txt 파일: Byte per Sector, Sector Count, Image Type, Source data size, Sector count
+ Hash Value (MD5, SHA1): 이미지 파일의 무결성 입증에 사용
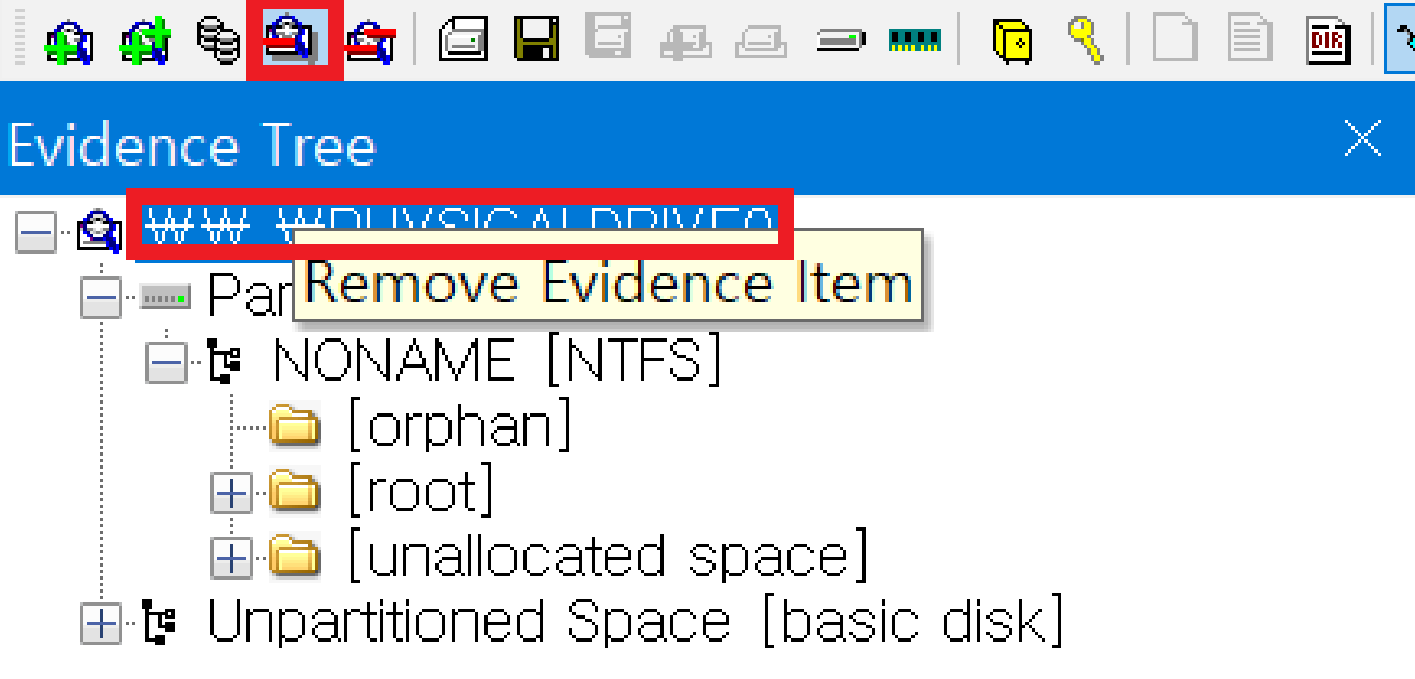
3. Add Evidence Item, Remove Evidence Item
Add Evidence Item: 디스크 증거 분석을 위한 디스크 할당
Remove Evidence Item: 디스크 해제
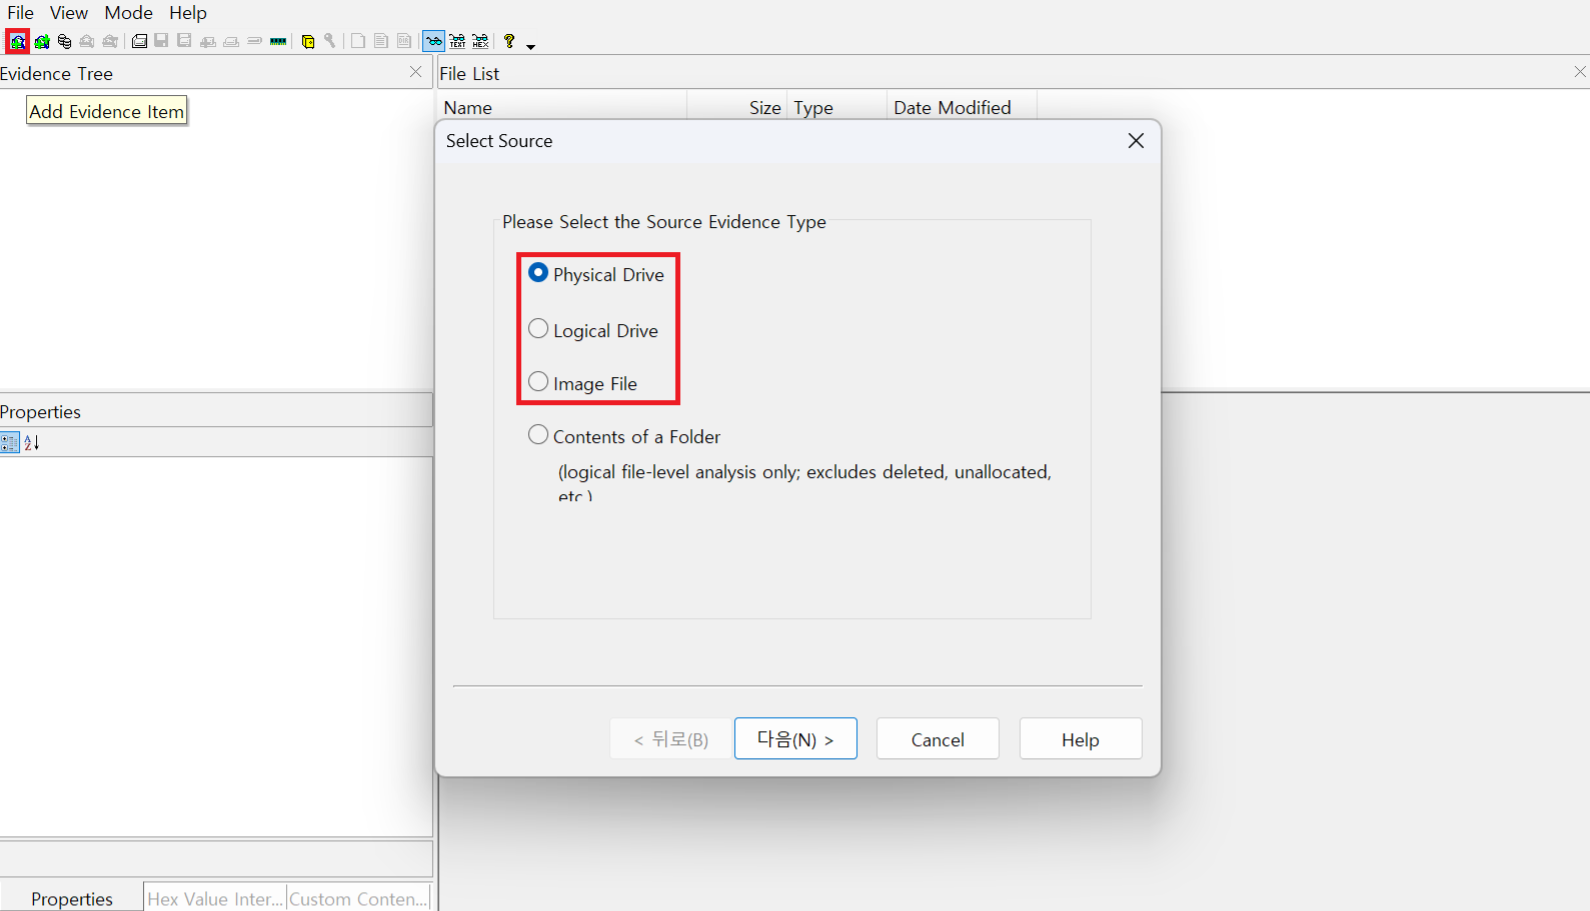
1. File → Add Evidence Item
- Pysical Drive: 물리 디스크 증거 분석 → 증거 분석 할 물리 디스크 선택
- Logical Drive: 물리 드라이브 증거 분석 → 증거 분석 할 물리 드라이브 선택
- Image File: 논리 디스크 파일 증거 분석 → 증거 분석 할 디스크 파일 선택
2. File → Remove Evidence Item
해제할 디스크 선택 → Remove Evidence Item
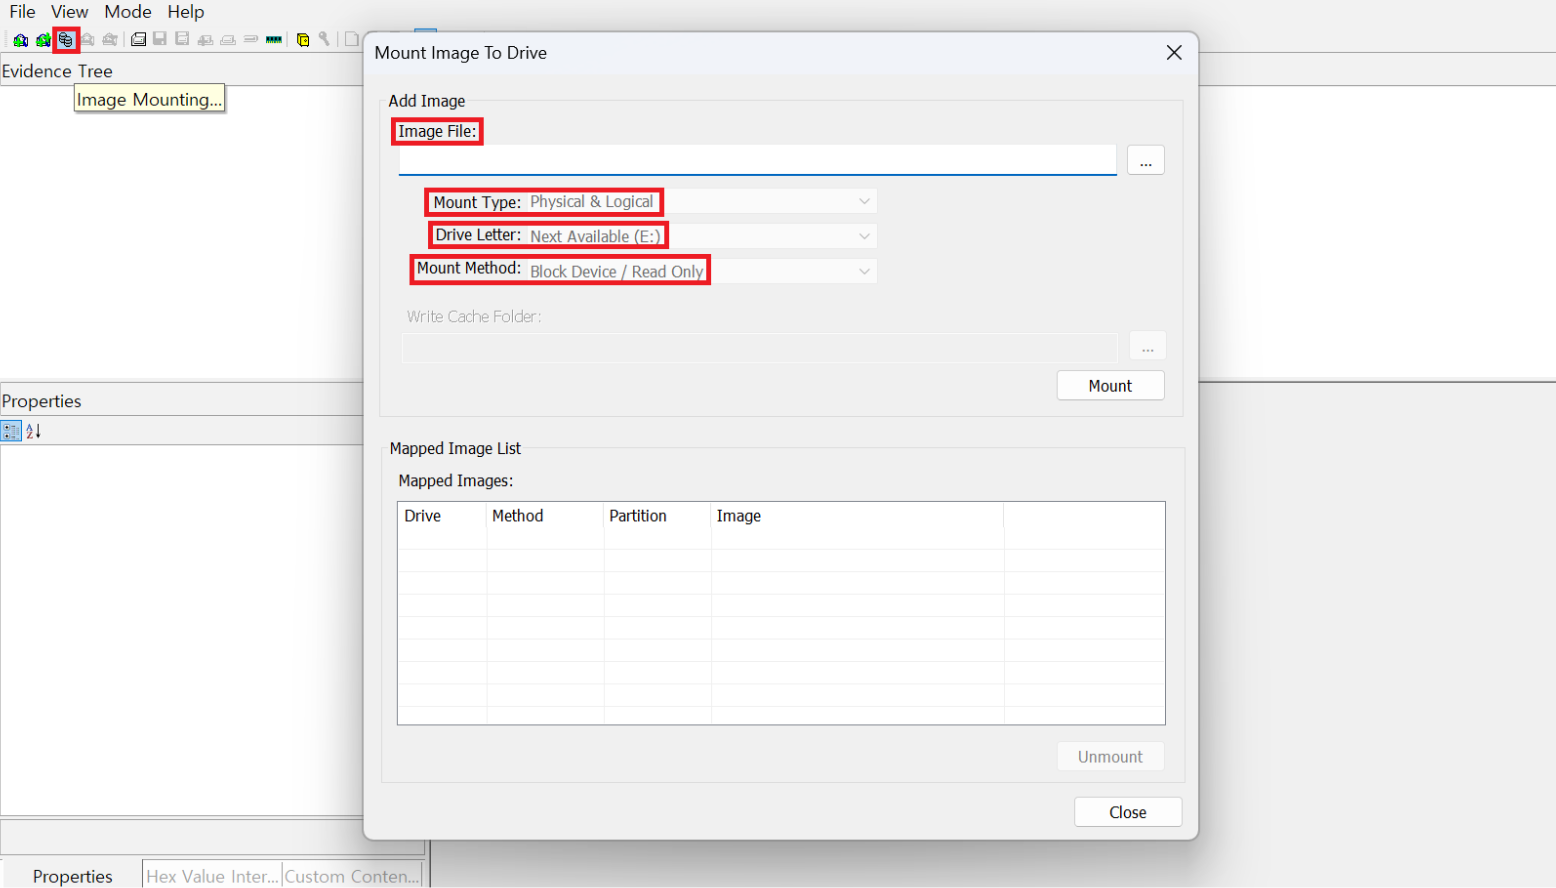
4. 이미지 마운팅 (Image Mounting)
1. File → Image Mounting → Mount
- Image File: 마운팅 할 이미지 파일 선택
- Mount Type: 마운트 하고자 하는 대상의 범위 선택
Pysical & Logical: 복합 적용
Pysical: 전체 디스크 (Drive Letter 선택 불가능)
Logical: 특정 파티션/파일 시스템 (Drive Letter 선택 가능, File system / Read Only 선택 가능)
- Drive Letter: 드라이브 철자 선택
- Mount Method: 마운트 된 이미지의 접근 및 조작 가능성 선택
Block Drive / Read Only: 마운트 된 이미지 읽기 전용 (Pysical)
Block Drive / Writable: 마운트 된 이미지에 데이터 쓰기 가능 (Pysical)
File system / Read Only: 마운트 된 이미지 읽기 전용 (Logical)
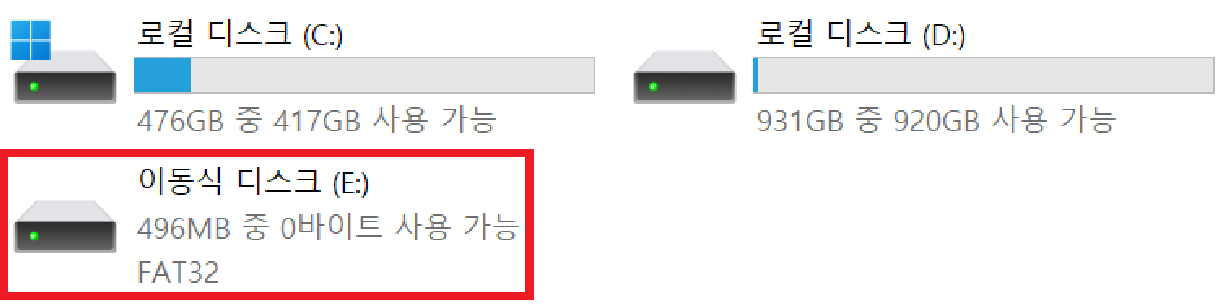
2. Result
- 마운트 된 모습
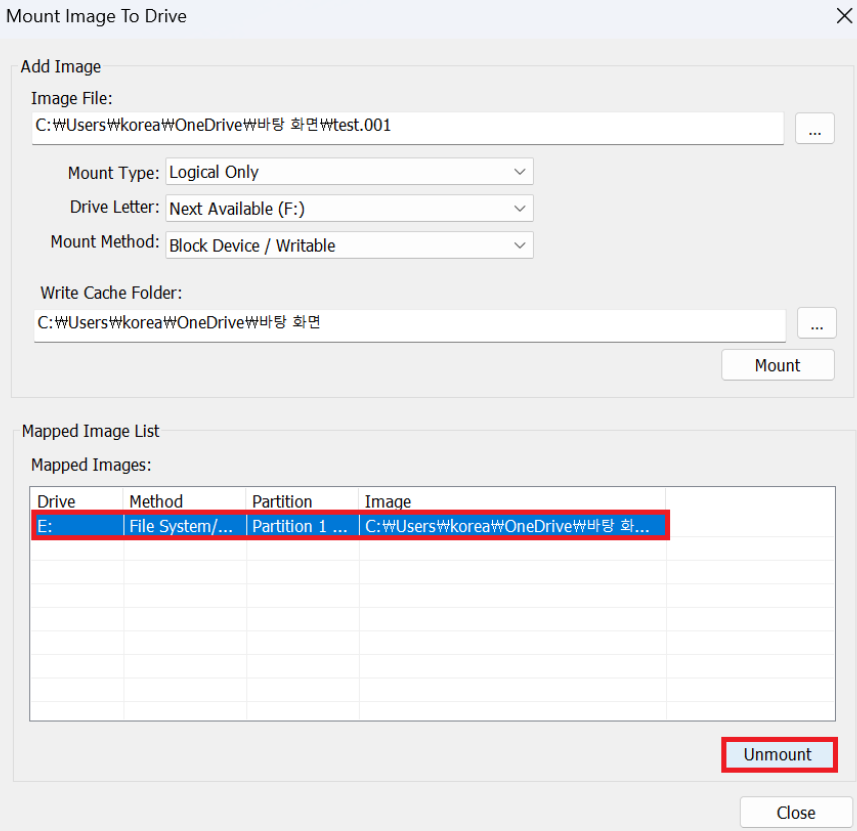
3. Mapped Images → 마운트 해제할 드라이브 선택 → Unmount
5. 메모리 덤프 (Memory Capture)
1. File → Memory Capture
- Destination path: 메모리 덤프 파일의 저장 경로
- Destination filename: 저장될 메모리 덤프 파일 이름
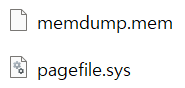
- Include pagefile: pagefiles.sys 덤프 여부
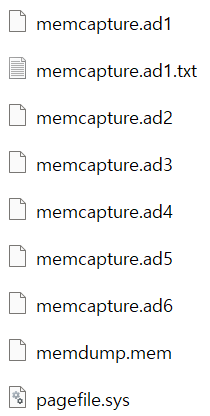
- Create AD1 file: AD1 file 생성 여부
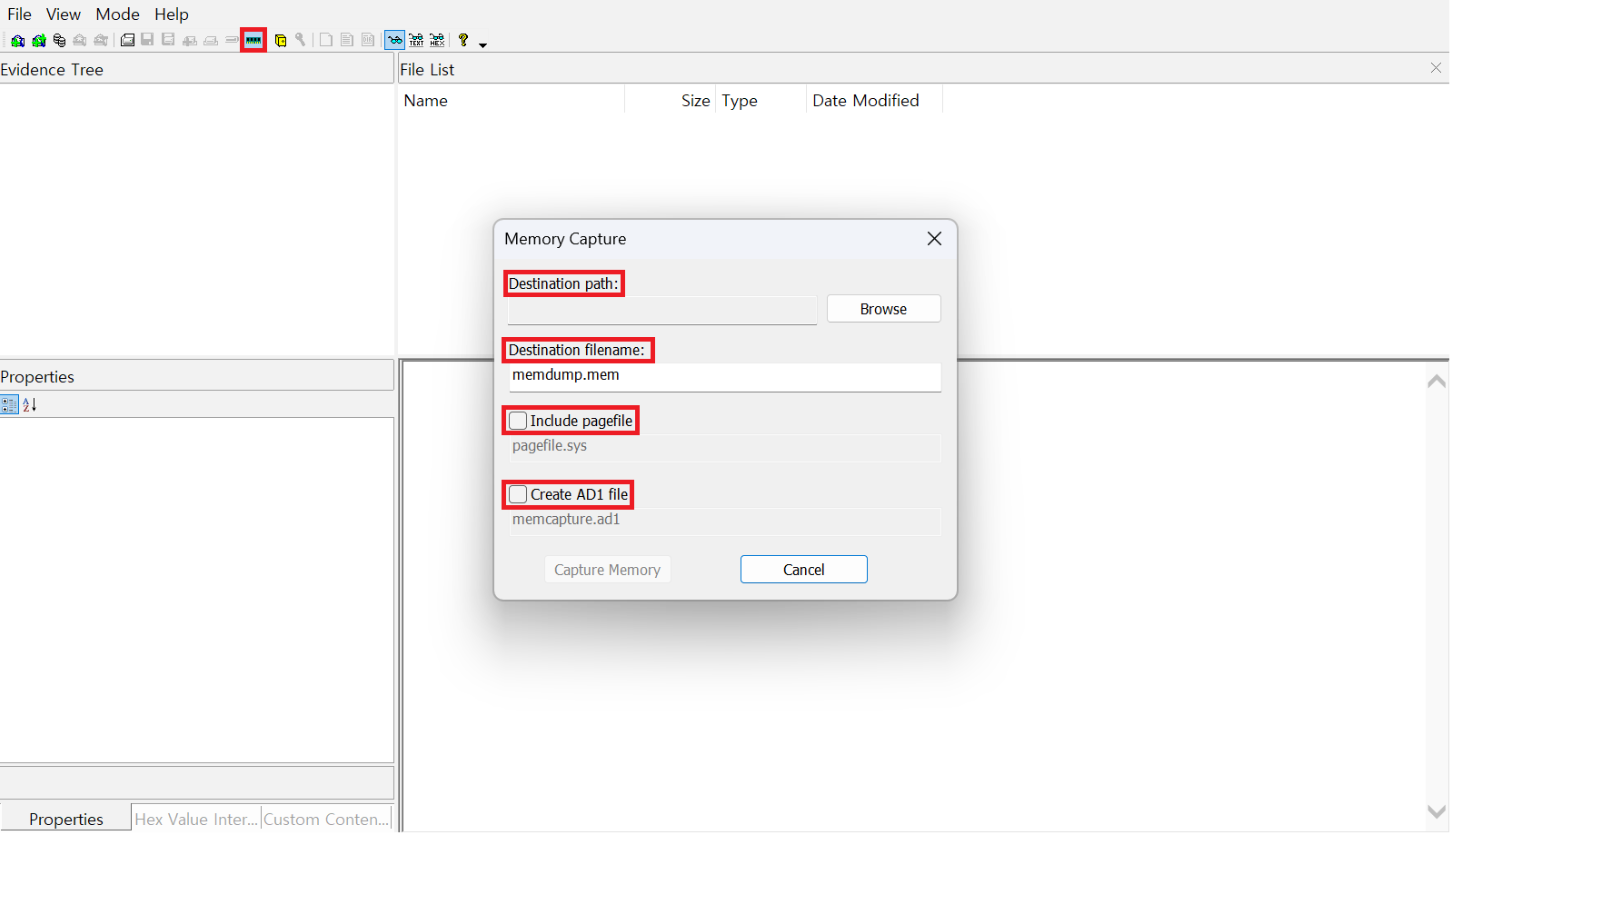
2. Result
- Include pagefile: 가상 메모리 파일
- Create AD1 file
AD1 file: 덤프 시 전체 또는 부분적인 이미지를 저장하여 분석 과정에서 원본 데이터가 변경되거나 손상되는 것을 방지, 해시값으로 데이터 무결성 입증
6. 하이브 파일 추출(Obtain Protected Files)
1. File → Obtain Protected Files
- Destination for obtained files: 추출될 하이브 파일의 저장 경로

2. Options → Result
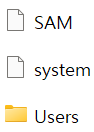
- Minimum files for login password recovery: Users, SAM, system 추출
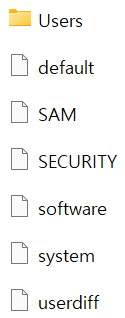
- Password recovery and all registry files: Users, default, SAM, SECURITY, software, system, userdiff 추출
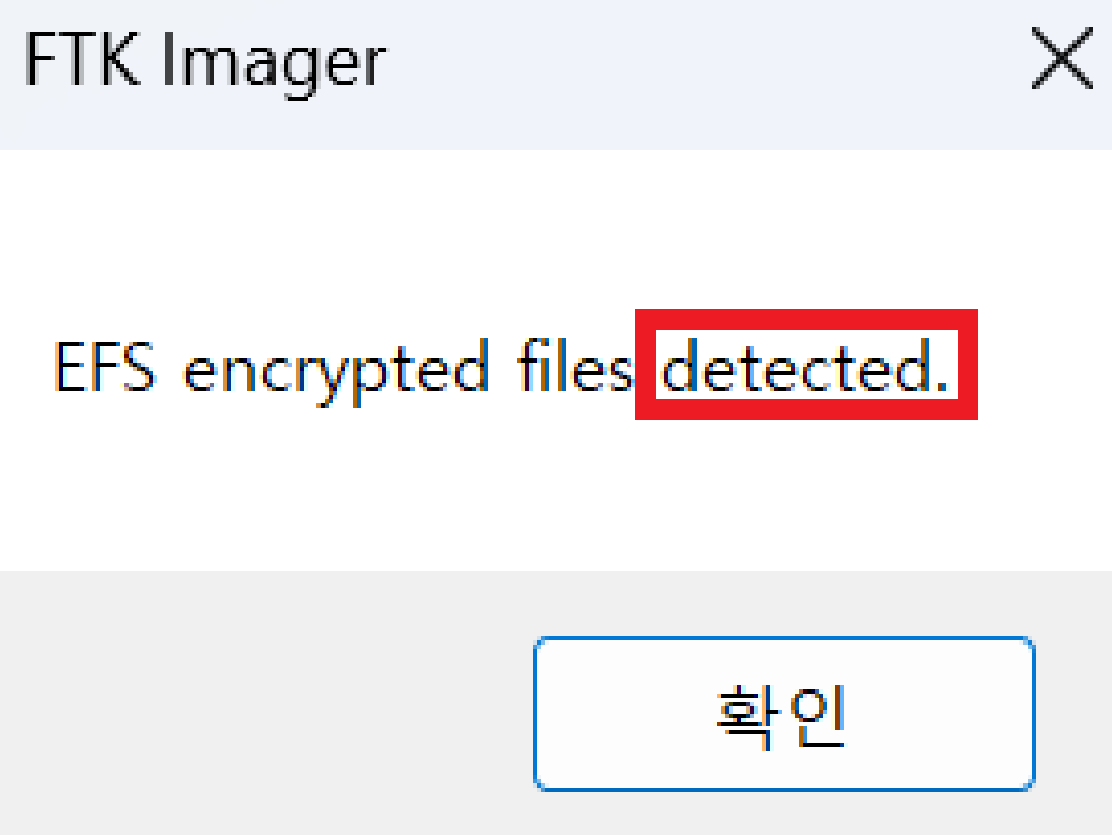
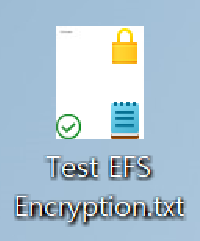
7. EFS 암호화 감지 (Detect EFS Encryption)
1. File → Detect EFS Encryption
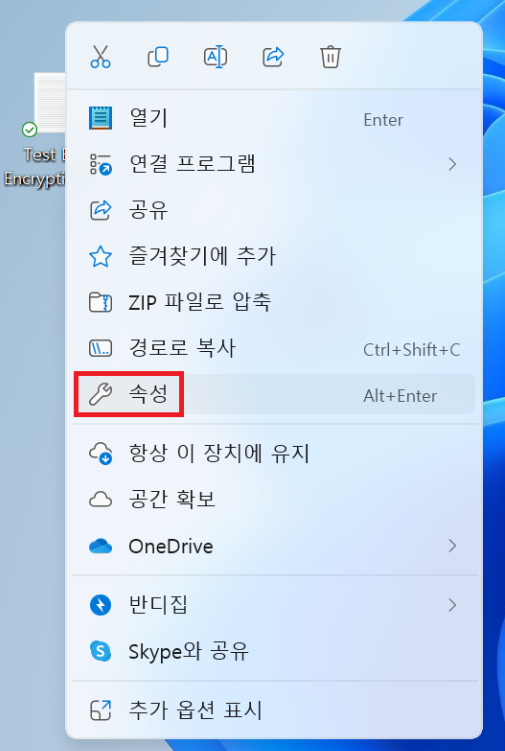
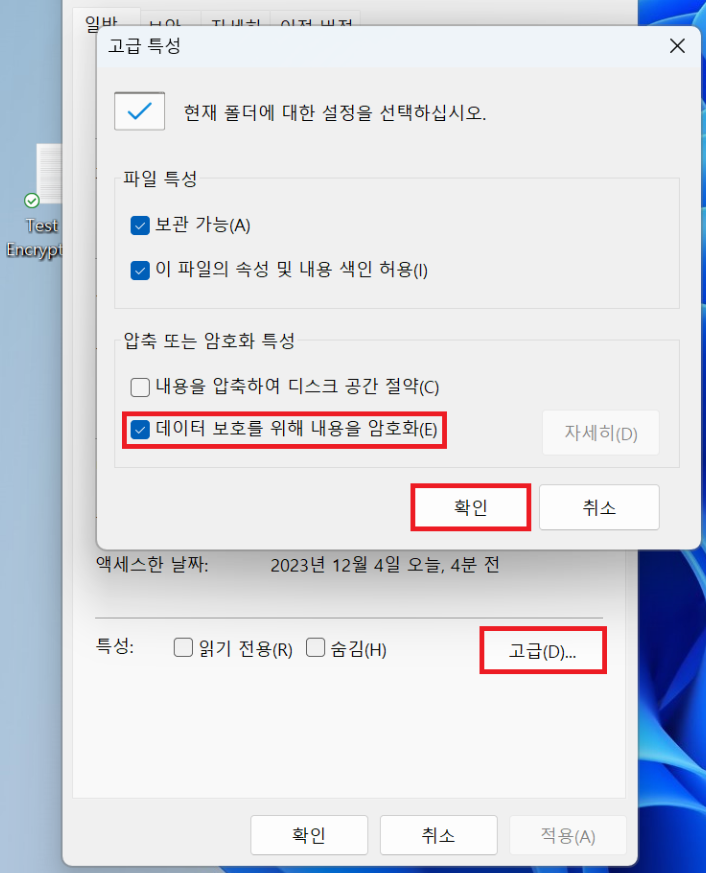
2. EFS 암호화
EFS (Encrypting File System): Microsoft Windows에서 제공하는 파일, 디렉터리 암호화 기능
사용법: 암호화할 파일 선택 → 속성 → 고급 → "데이터 보호를 위해 내용 암호화" 선택
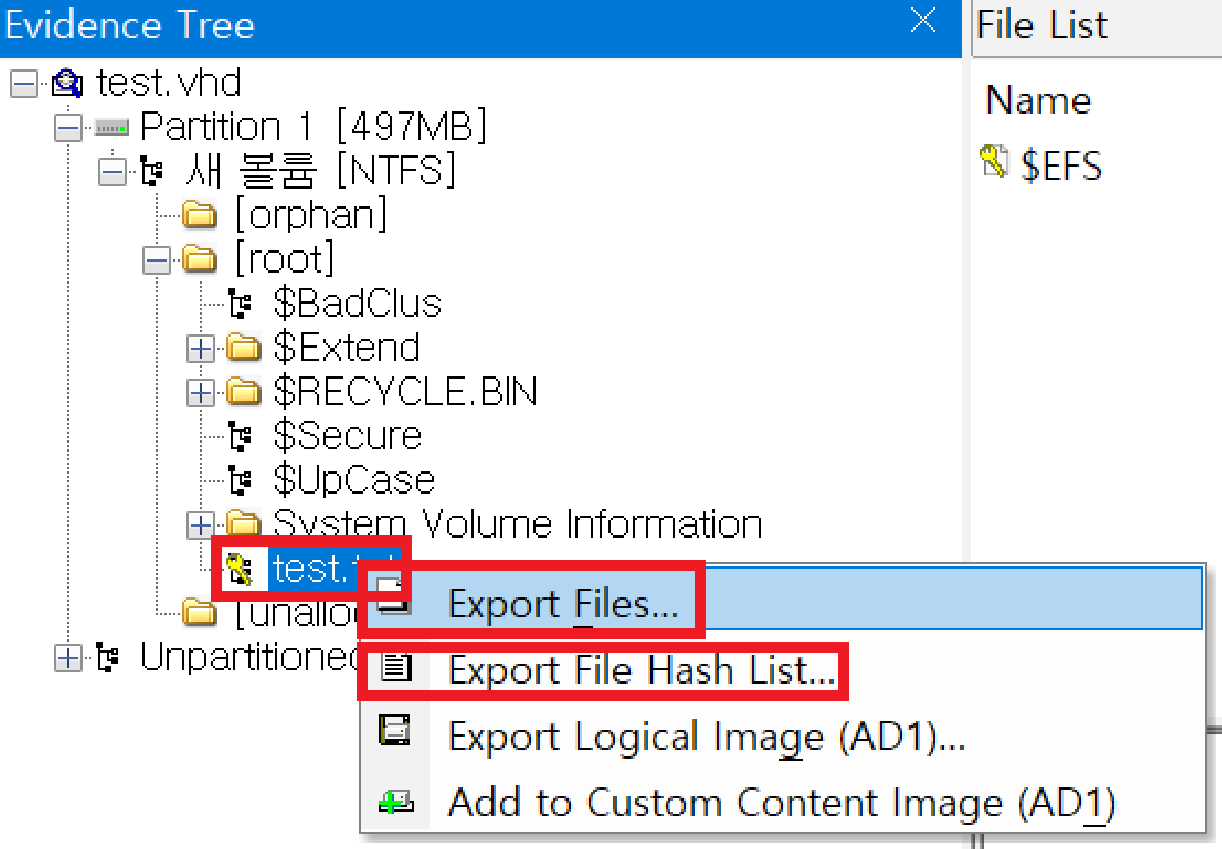
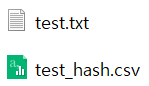
8. 파일 및 파일 해시 추출 (Export Files, Export File Hash List)
Evidence Tree 혹은 File List에서 추출하고자 하는 파일 우클릭 → Export Files, Export File Hash List